Chi Chi Dango with a Touch of Mango, Two Ways
Growing up in Hawai‘i, March 3rd and May 5th were days I always looked forward to because they meant chi chi dango (also called chichi dango) was sure to be passed out in class. The Japanese holiday of Girls’ Day (sometimes called Doll’s Day) or Hinamatsuri was always celebrated on March 3rd and Boys’ Day or Tango No Sekku was May 5th. Today, however, in Japan May 5th is now celebrated as Children’s Day or Kodomo No Hi. So I hope you all had some chi chi dango the other day.
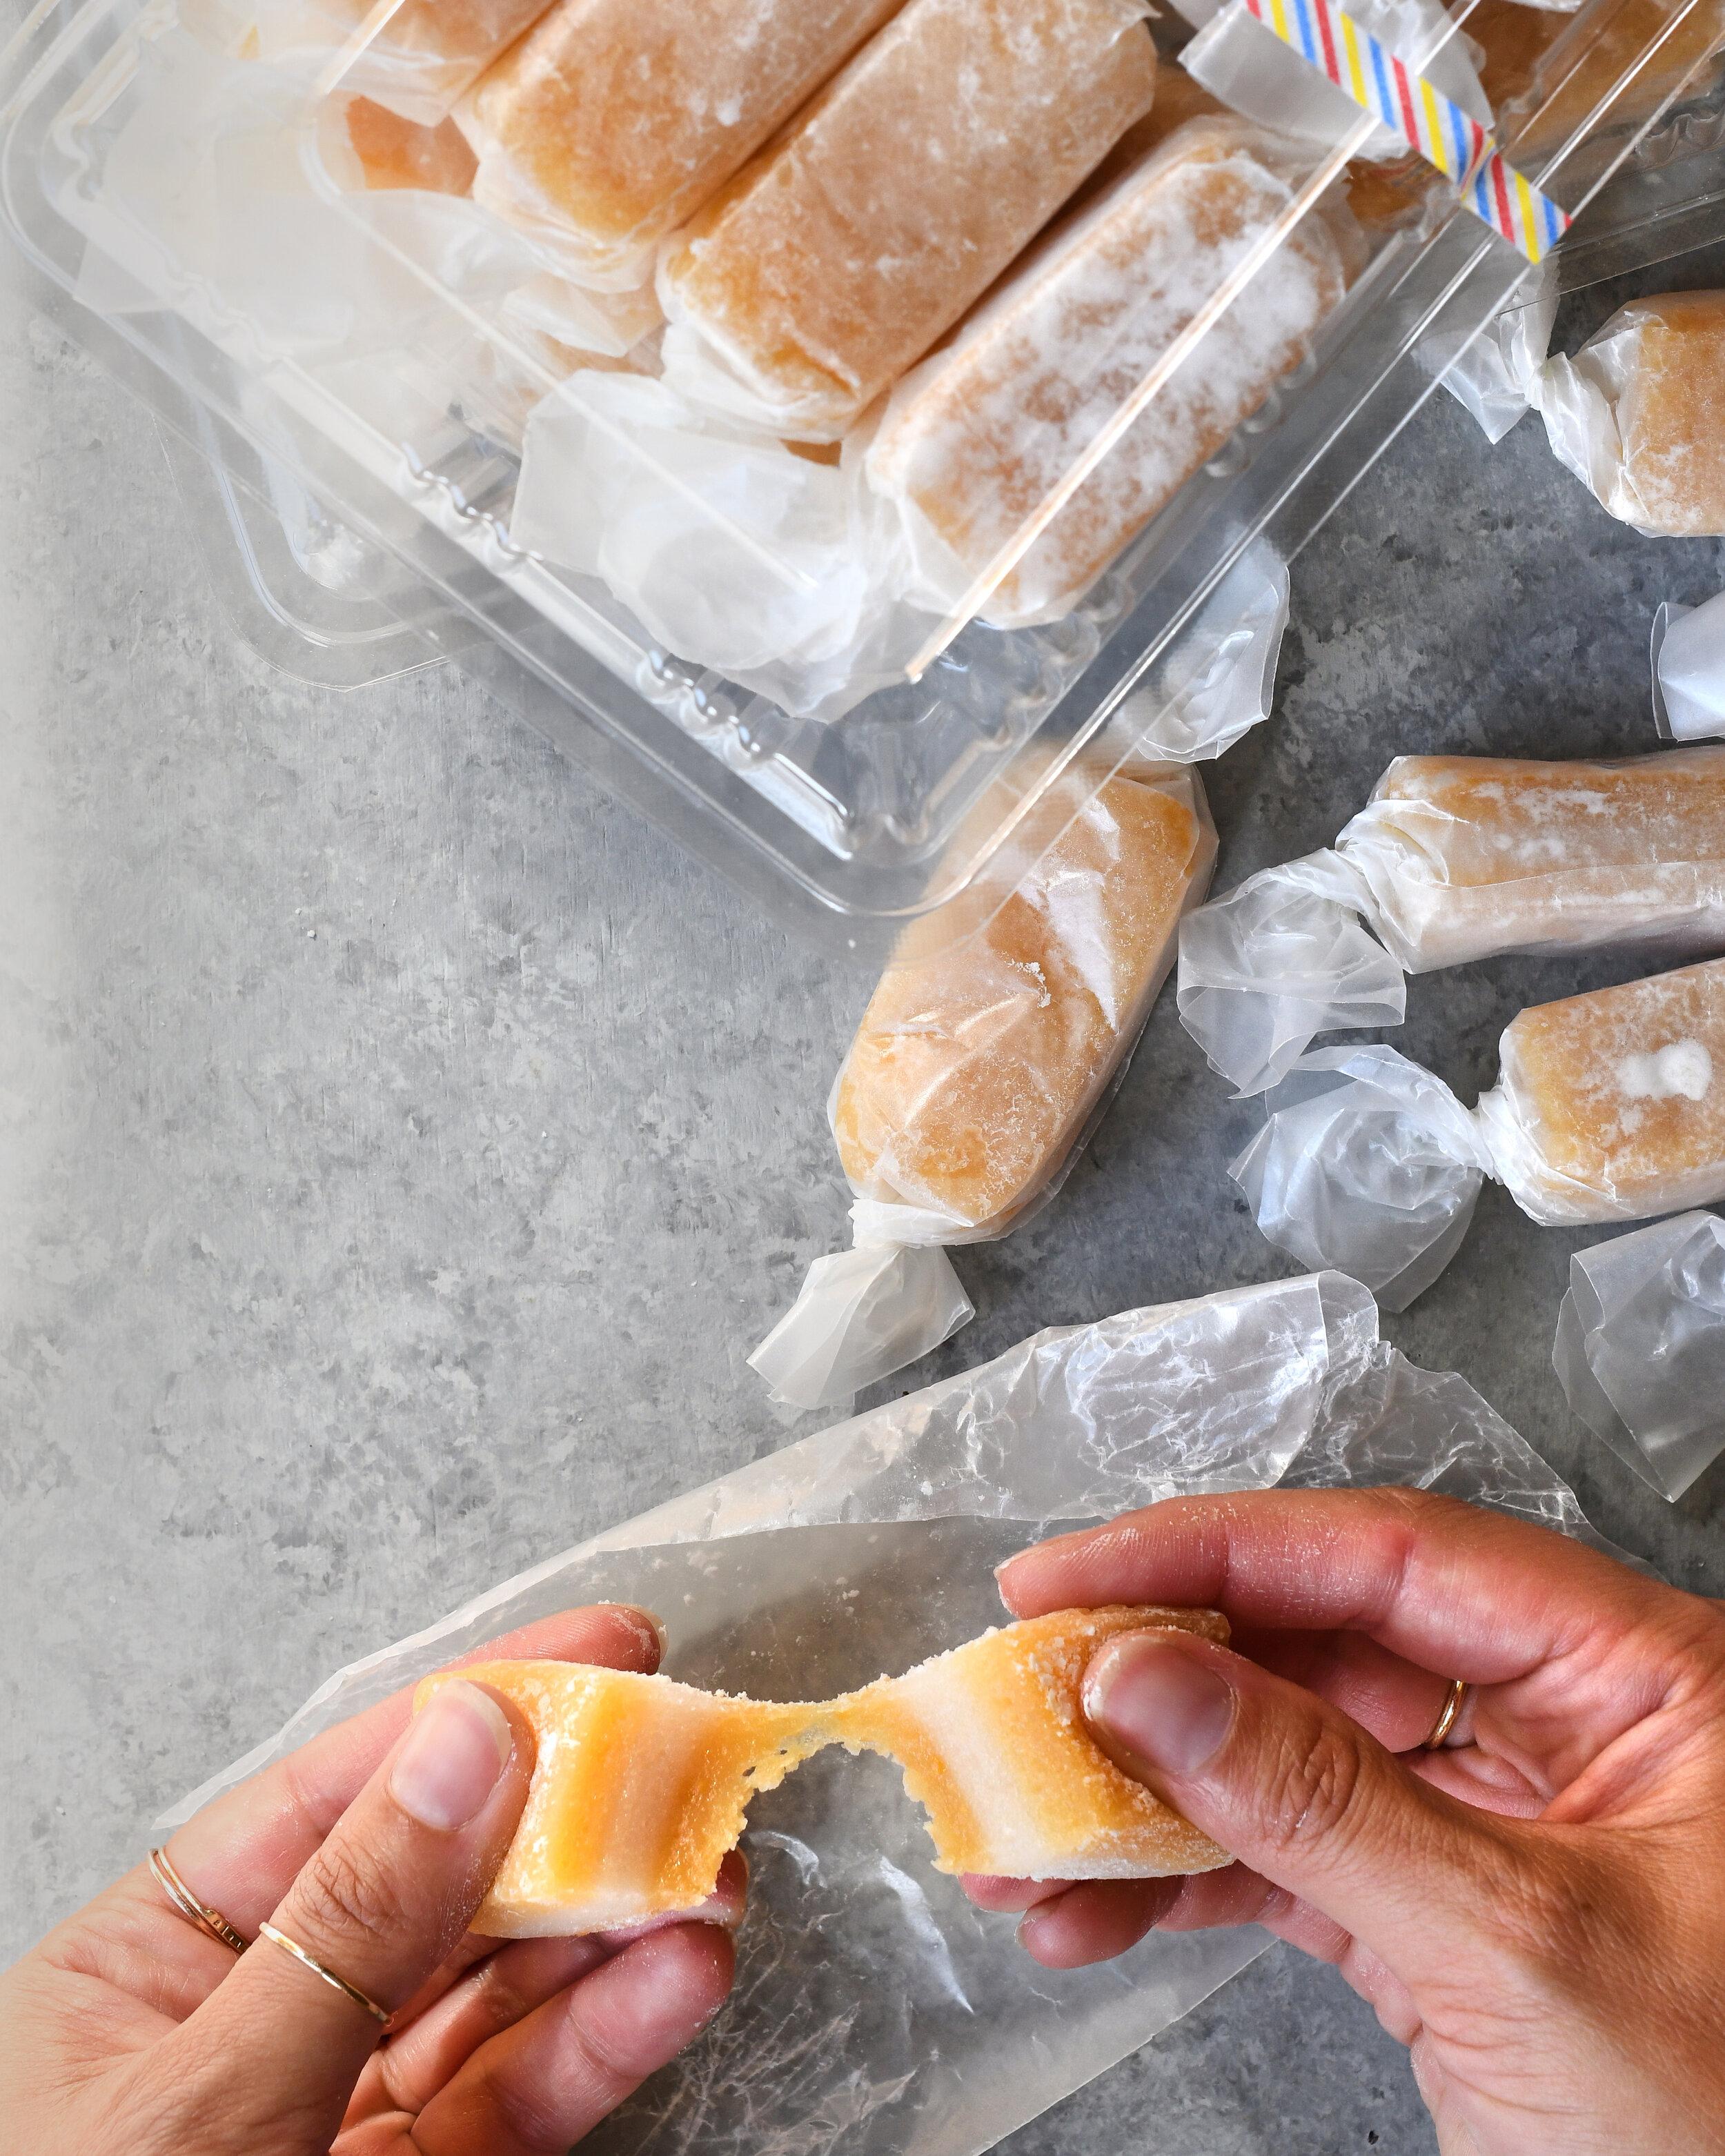
For those of you who are not familiar with chi chi dango, I would describe it as a pillowy soft, coconutty, slightly chewy, and sweet little dumpling. Dango means dumpling in Japanese. Dusted in potato starch, these bite-sized cuties are made for snacking. A pronounced coconut flavor is a hallmark of chi chi dango, so when I set out to create a mango version, I wanted to ensure the coconut flavors still sang. Hence, you’ll find both of my mango-y recipes have just a touch of that mango tang to round out the sweet and nutty coconut notes.


I decided to develop two versions, to make it as easy as possible for you to add some mango-y goodness to your dango. Note, these recipes will work for other flavors, so please feel free to experiment. I can see strawberry, guava, and liliko‘i working really well here. Dango is traditionally steamed but has been adapted to be made at home in the oven with the help of a tight foil wrapping of your pan. This helps to steam the dango while it’s baking.
A note on sourcing ingredients. For the freeze-dried mango, I grabbed a bag at Trader Joes, but I believe it is available at other grocers. My favorite brand of mochiko Koda Farms and I found mine at Mitsuwa. The Kerns mango nectar came in a can and it was a dollar (!). Look for full-fat coconut milk without any added sugar. The potato starch also came from Mitsuwa. Make sure to pick up a roll of wax paper to wrap your dango—it’s easier than parchment. And that I believe is it. Happy baking.


Chi Chi Dango with a Touch of Mango, Two Ways
Version One with Freeze-Dried Mango
Makes 40 one-by-two-inch pieces
INGREDIENTS
1 (1.7 oz) bag freeze dried mango
1 ¾ cup plus 2 teaspoons granulated sugar, divided
1 (16 oz) box mochiko (sweet glutinous rice flour)
1 teaspoon baking powder
A small pinch of kosher salt
1 (13.5 oz) can full-fat coconut milk
1 ¾ cup water
2 teaspoons pure vanilla extract
A few drops of yellow/orange food coloring
½ cup potato starch
FIX
Preheat the oven to 350°F and set the rack in the middle. Grease a 9x13 pan with cooking spray, making sure to get all the corners and set it aside.
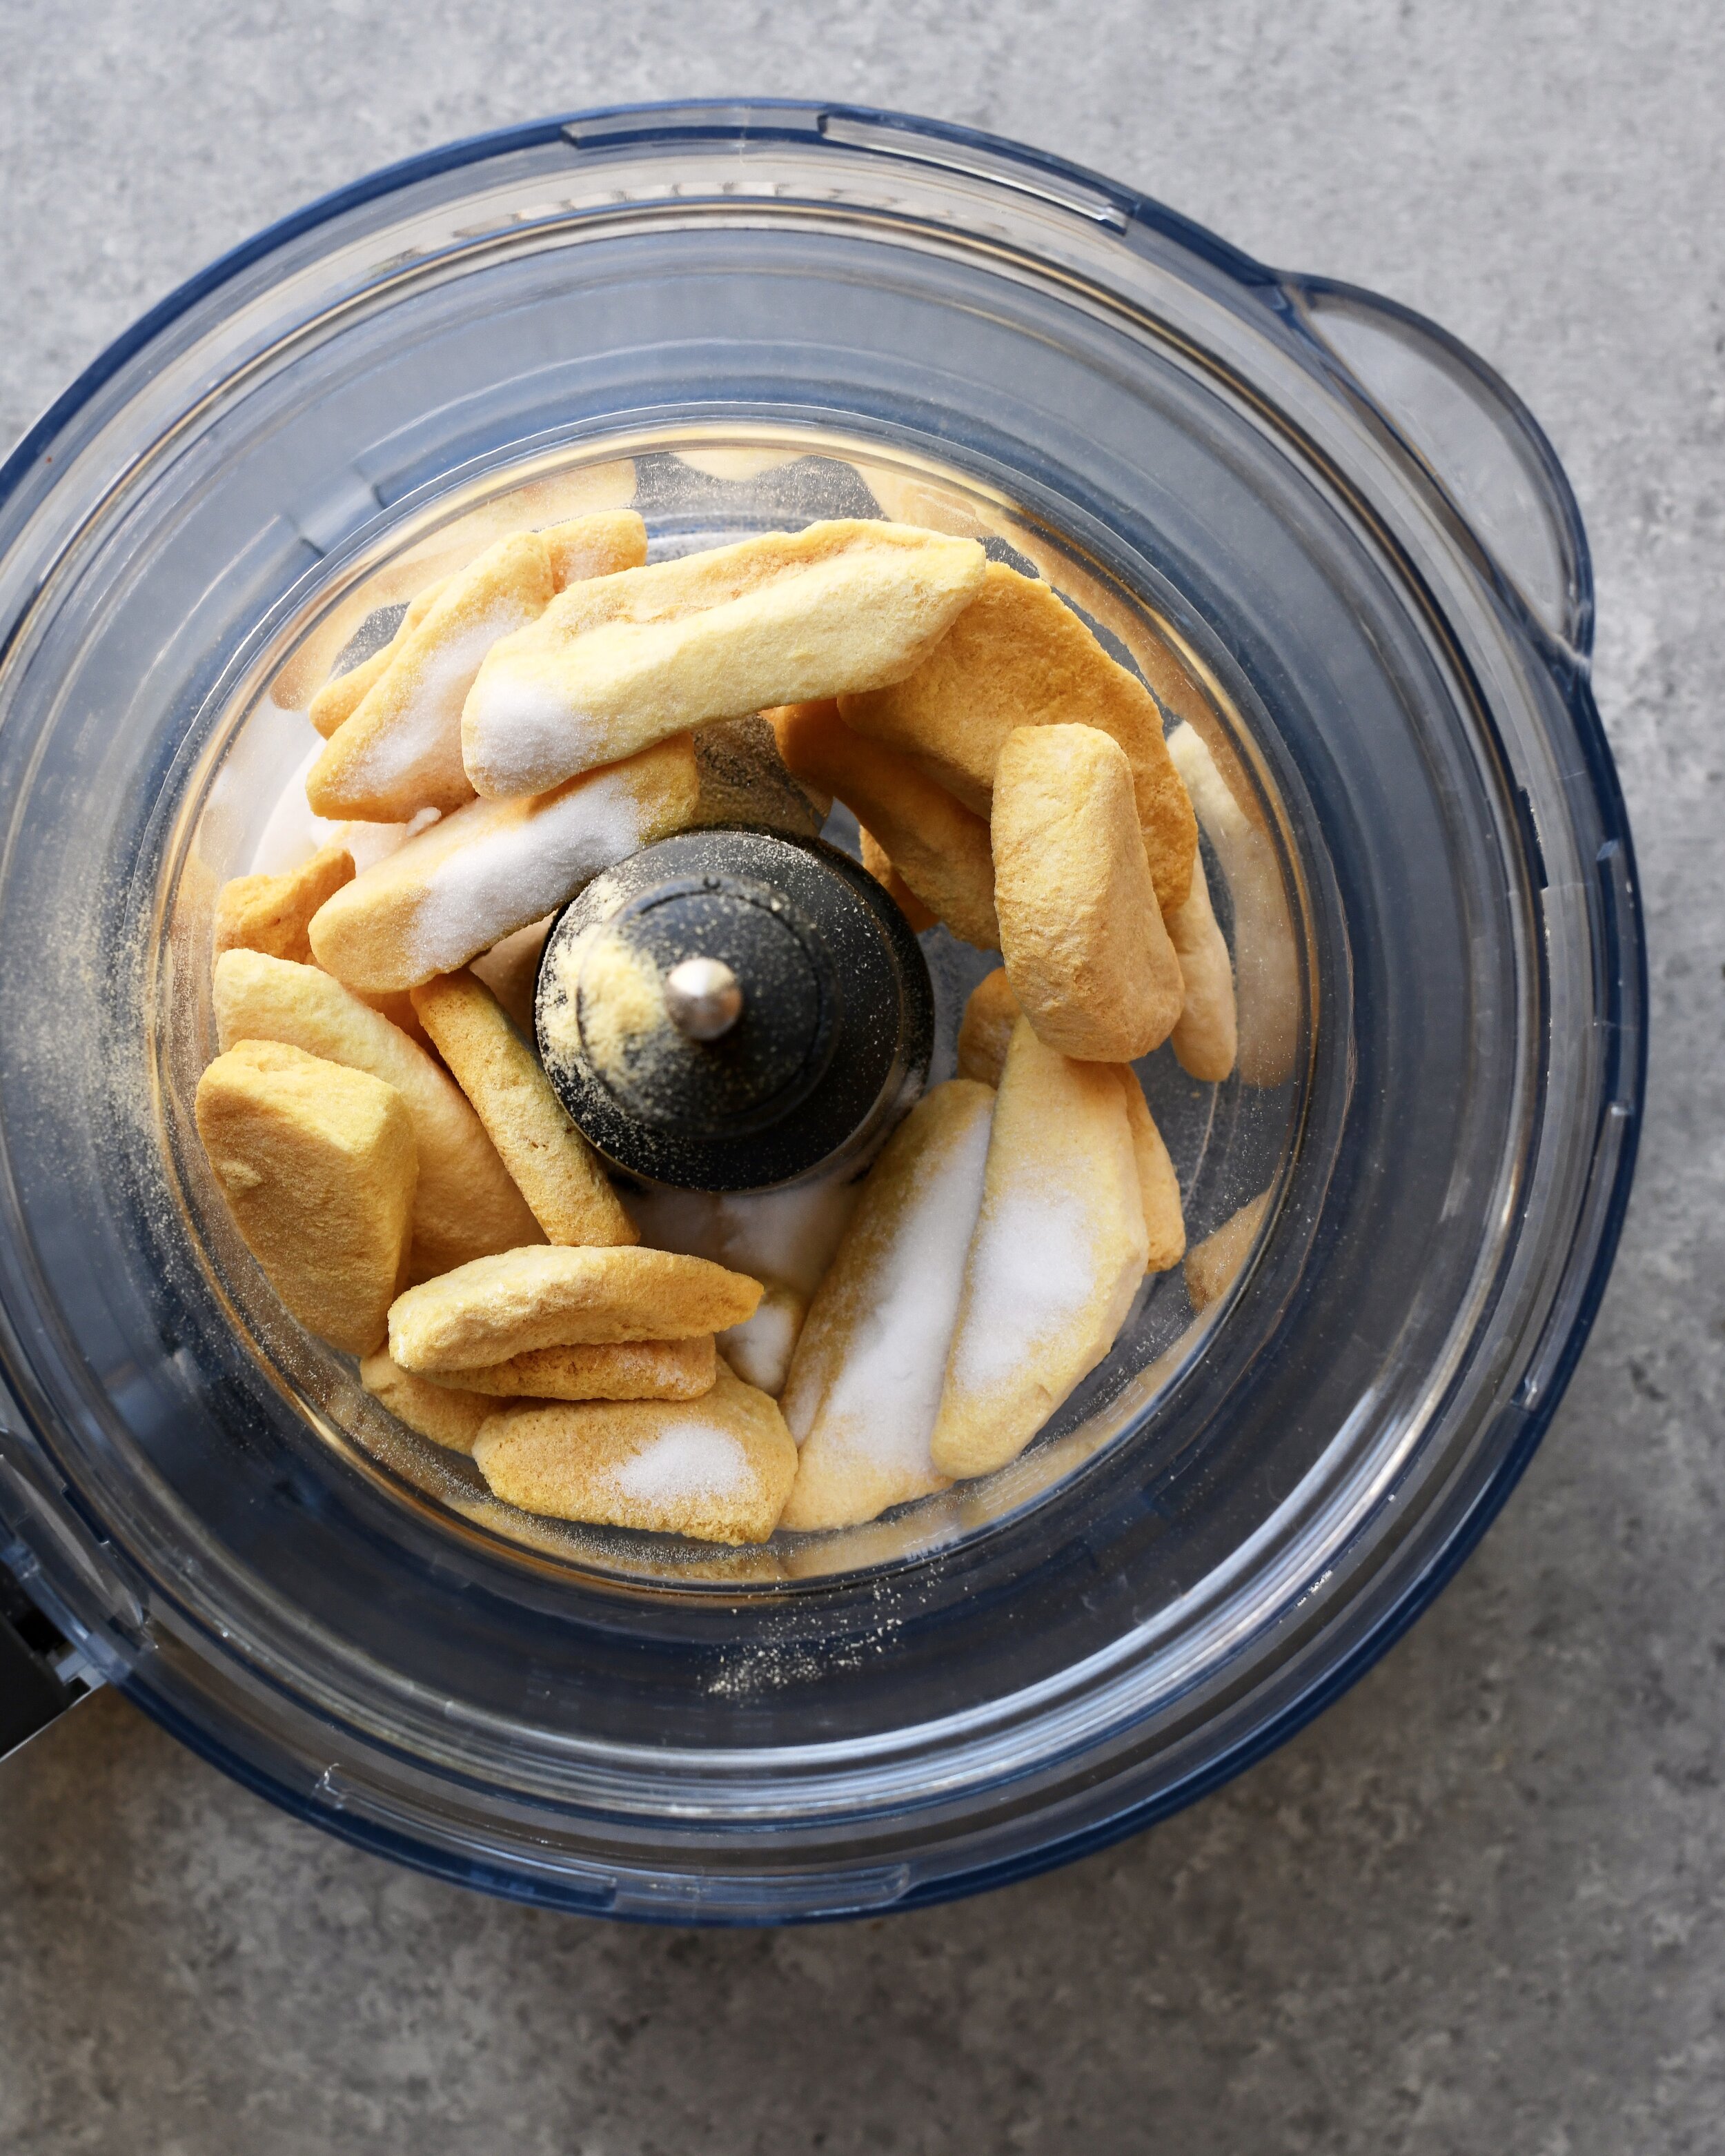
Using a food processor, pulverize the freeze-dried mango with 2 teaspoons of granulated sugar. Process until it resembles a fine powder. Set aside.
In a bowl, whisk together the remaining 1 ¾ cups of granulated sugar, mochiko, baking powder, and salt and set aside. In a large bowl, whisk the coconut milk, water, and vanilla extract together well or until smooth. Be sure to break up any lumps of coconut. Pour the dry into the wet mixture and whisk until smooth.
Reserve a third of the mixture in the smaller bowl. Whisk the mango powder and a few drops of food coloring into the remaining two-thirds of the mixture and whisk until smooth. Pour a third of the mango-y mixture into the bottom of the well-greased 9x13 pan, rapping the pan on the counter a few times to bring up any air bubbles. Tightly cover the pan with a piece of aluminum foil and bake for 15 minutes.
Carefully remove the pan from the oven and lift off the foil. Evenly pour the reserved third of plain vanilla mix, using a spatula to guide it to the edges if necessary. The goal is to have an even layer. Recover the pan with the foil and bake for 25 minutes. Repeat this step with the last remaining third of the mango mix and bake for 35 minutes.
While the dango is cooling, cut some wax paper to size. For one-inch by 2-inch pieces, I prefer to cut my wrappers into four-inch by six-inch pieces. For pieces of this size, you’ll need 40 wrappers in total. Cut the wrappers to size accordingly if you prefer to cut different sized dango.
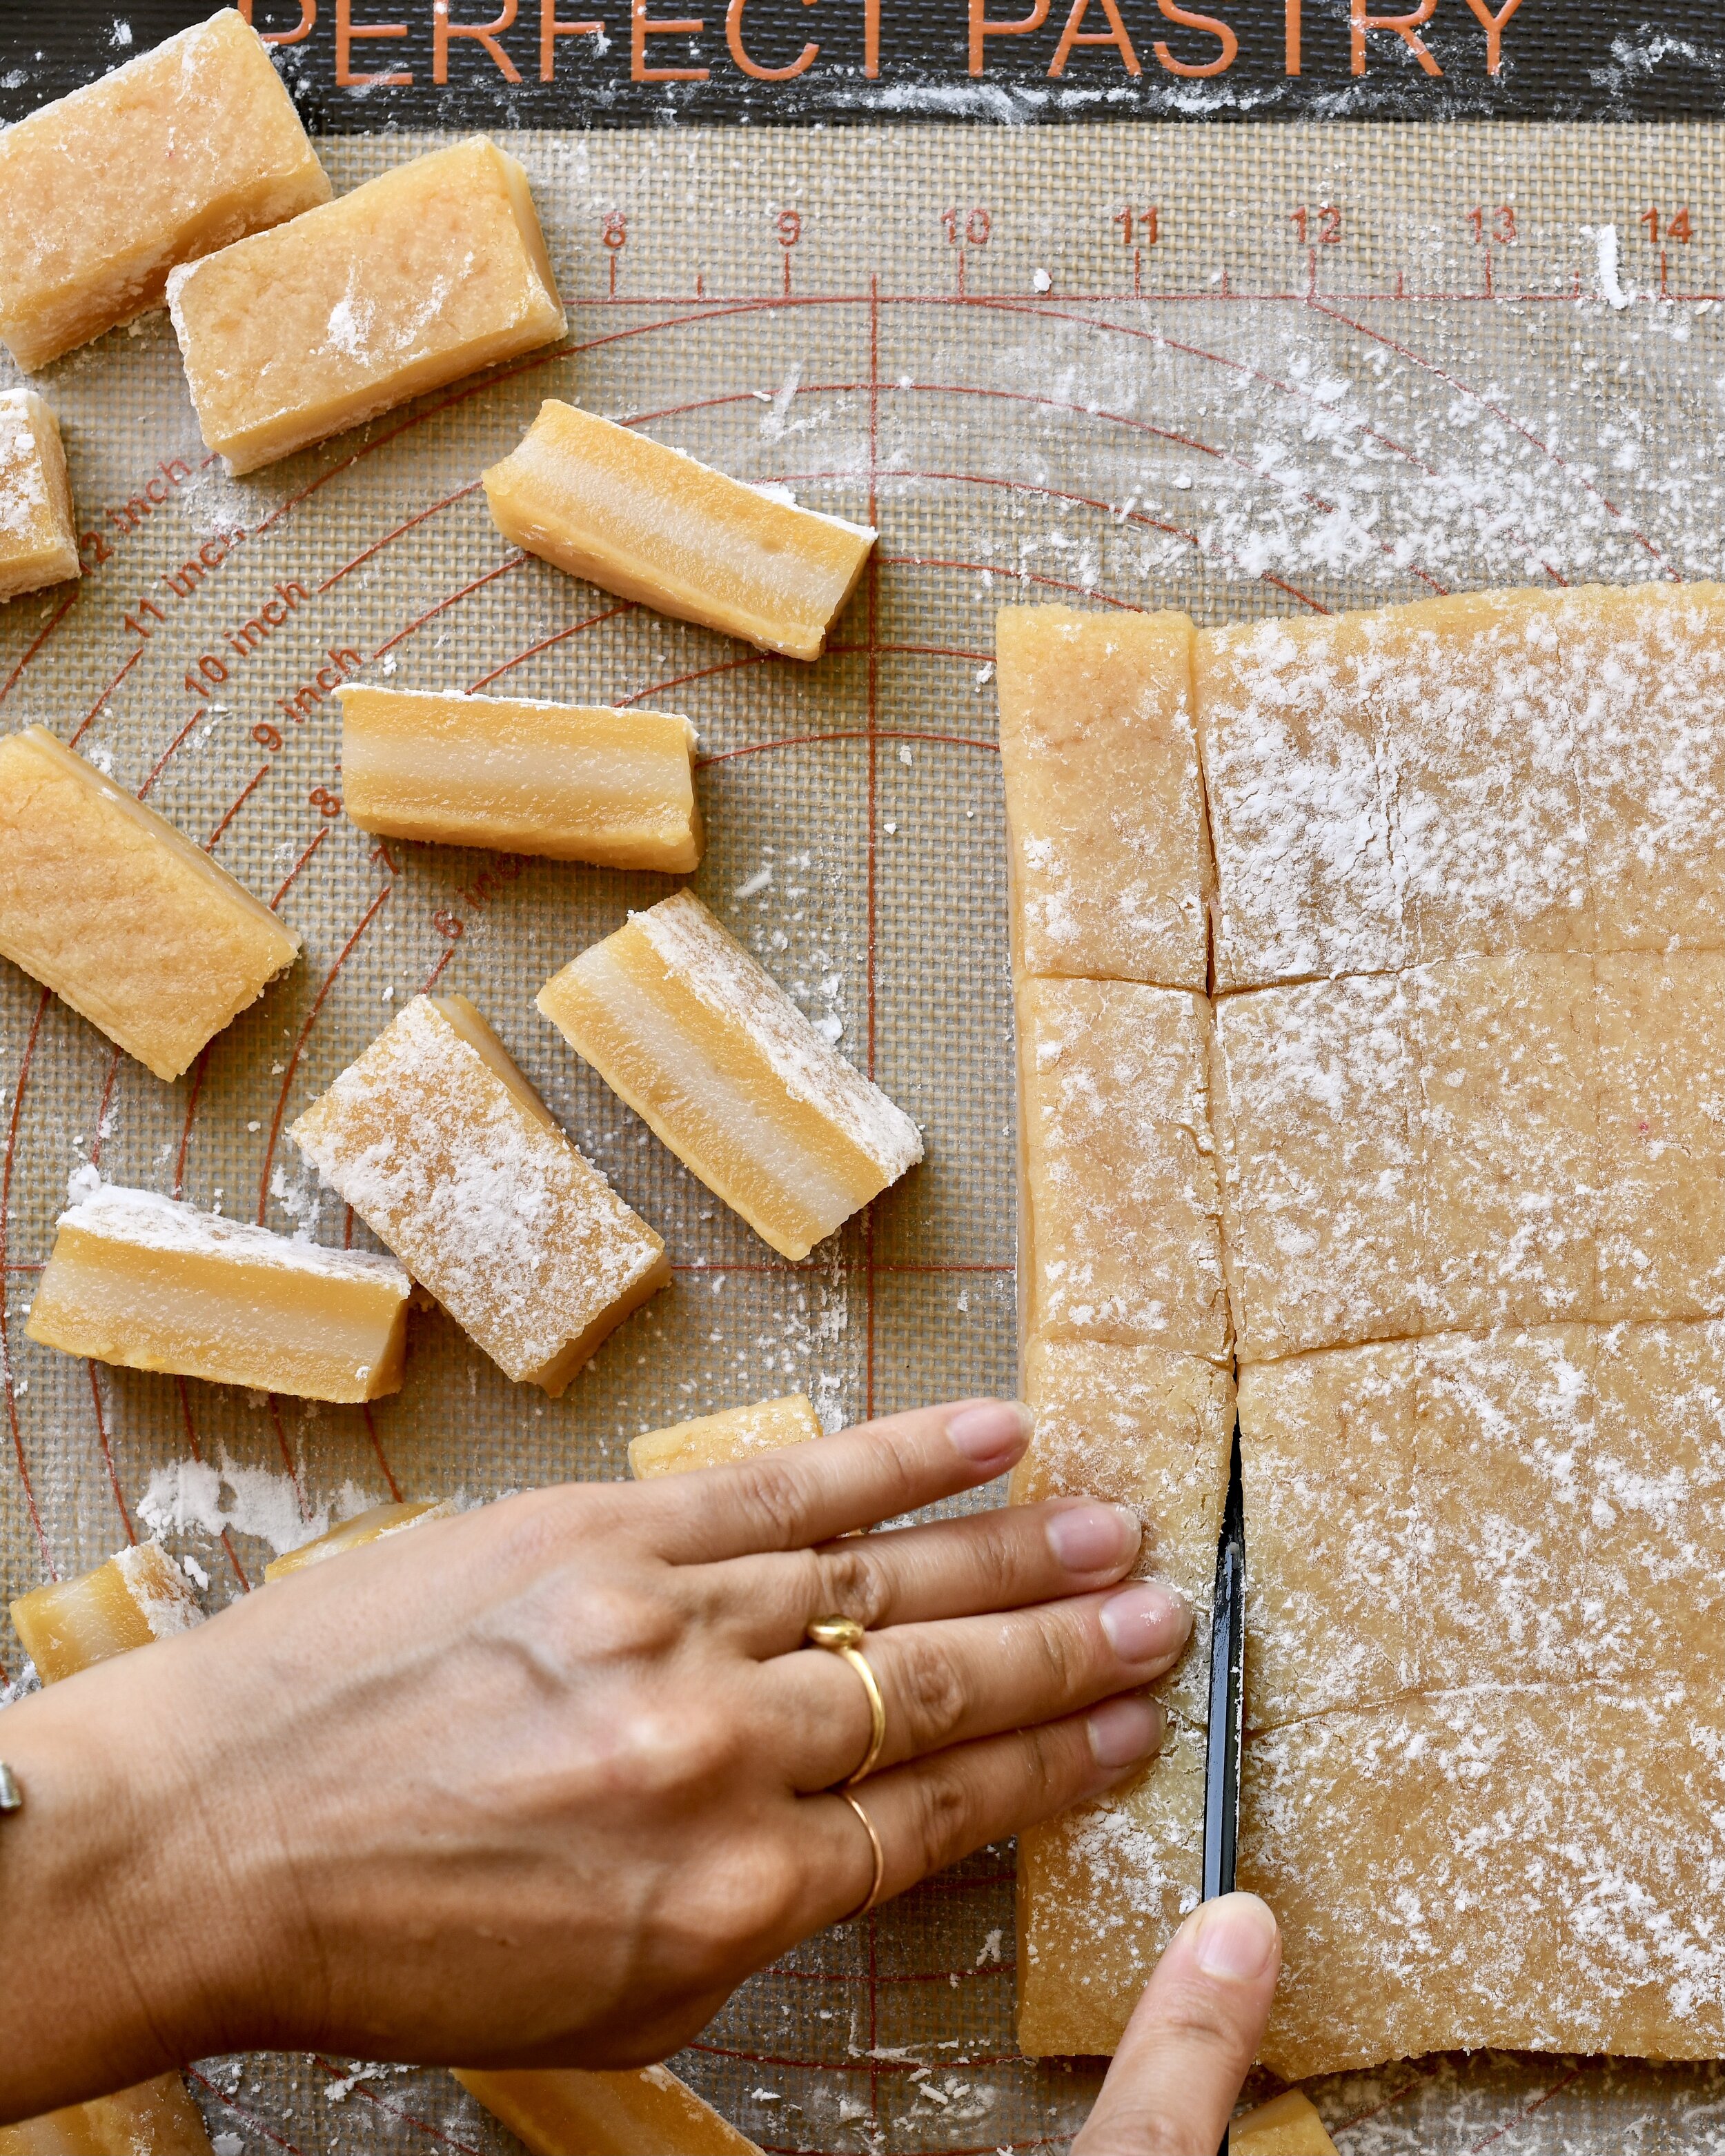
Set the pan on a rack to cool completely, removing the aluminum foil. It will take a few hours, but it’s worth the wait as it’s much easier to work with when cool. Once cool, use a plastic knife, dusted with potato starch, to trim all the edges if desired. This is an optional step, but the outer edges will have a crust that is tougher than the rest of the dango. Next, dust a clean work surface with enough potato starch to cover an area the size of the pan. Invert the pan and turn the dango out. I have found that a plastic knife dusted with potato starch is the easiest to use when cutting the dango as it provides the easiest release. Cut the dango into your preferred size--I like one inch by two inches and roll each piece in some potato starch to dust all the sides. This will prevent the dango from sticking to you and other surfaces. Wrap each piece in the pre-cut wax paper wrappers. These are best enjoyed the first day (they’ll be the softest) and should be consumed within two days of making.

Chi Chi Dango with a Touch of Mango, Two Ways
Version Two with Mango Nectar
Makes 40 one-by-two-inch pieces
INGREDIENTS
1 ¾ cup granulated sugar
1 (16 oz) box mochiko (sweet glutinous rice flour)
1 teaspoon baking powder
A small pinch of kosher salt
1 (13.5 oz) can full-fat coconut milk
2 teaspoons pure vanilla extract
3 tablespoons plus ½ cup water, divided
1 cup mango nectar (I used Kern)
A few drops of yellow/orange food coloring
½ cup potato starch
FIX
Preheat the oven to 350°F and set the rack in the middle. Grease a 9x13 pan with cooking spray, making sure to get all the corners and set it aside.
In a large bowl, whisk together the granulated sugar, mochiko, baking powder, and salt and set aside. In another bowl, whisk the coconut milk, vanilla extract, and 3 tablespoons of water together well or until smooth. Be sure to break up any lumps of coconut. Pour the coconut mixture into the dry mixture and whisk until smooth. It will be thick.
Reserve a third of the mixture in the smaller bowl. Whisk the mango nectar and a few drops of food coloring into the large bowl with two-thirds of the mixture and whisk until smooth. Whisk the remaining ½ cup of water into the smaller bowl with a third of the mixture and whisk until smooth. Pour a third of the mango-y mixture into the bottom of the well-greased 9x13 pan, rapping the pan on the counter a few times to bring up any air bubbles. Tightly cover the pan with a piece of aluminum foil and bake for 15 minutes.
Carefully remove the pan from the oven and lift off the foil. Evenly pour the reserved third of plain vanilla mix, using a spatula to guide it to the edges if necessary. The goal is to have an even layer. Recover the pan with the foil and bake for 25 minutes. Repeat this step with the last remaining third of the mango mix and bake for 35 minutes.
While the dango is cooling, cut some wax paper to size. For one-inch by 2-inch pieces, I prefer to cut my wrappers into four-inch by six-inch pieces. For pieces of this size, you’ll need 40 wrappers in total. Cut the wrappers to size accordingly if you prefer to cut different sized dango.
Set the pan on a rack to cool completely, removing the aluminum foil. It will take a few hours, but it’s worth the wait as it’s much easier to work with when cool. Once cool, use a plastic knife, dusted with potato starch, to trim all the edges if desired. This is an optional step, but the outer edges will have a crust that is tougher than the rest of the dango. Next, dust a clean work surface with enough potato starch to cover an area the size of the pan. Invert the pan and turn the dango out. I have found that a plastic knife dusted with potato starch is the easiest to use when cutting the dango as it provides the easiest release. Cut the dango into your preferred size--I like one inch by two inches and roll each piece in some potato starch to dust all the sides, brushing off excess starch as you go. This will prevent the dango from sticking to you and other surfaces. Wrap each piece in the pre-cut wax paper wrappers. These are best enjoyed the first day (they’ll be the softest) and should be consumed within two days of making.